कभी आपके पास 50–100 pages की PDF आती है और असली problem पढ़ना नहीं, बल्कि ये समझना होता है कि इसमें जरूरी क्या है। Research paper, college notes, government report, company document या किसी long ebook को पूरा पढ़ने में काफी समय लग सकता है।
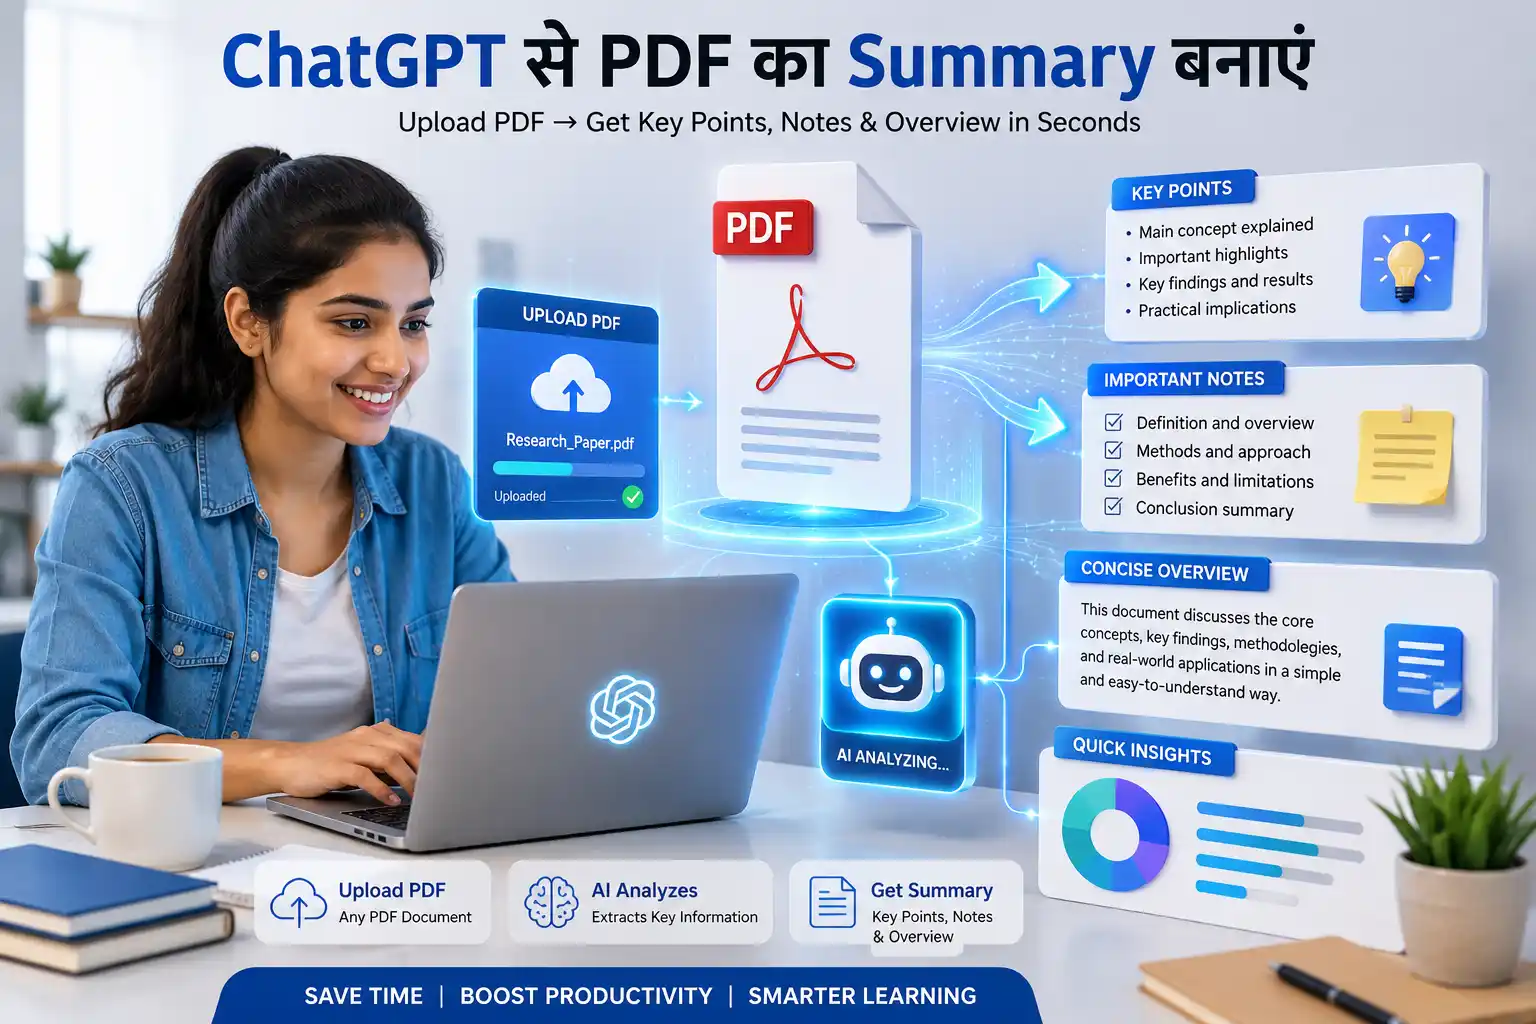
यहीं ChatGPT se PDF ka summary बनाना काफी useful हो जाता है। आप PDF सीधे ChatGPT में upload करके उसका short summary, detailed explanation, chapter-wise notes, key points या specific questions के answers निकलवा सकते हैं। OpenAI की current documentation के मुताबिक ChatGPT PDF सहित कई common document formats को upload करके summarize, analyze और specific information extract कर सकता है।
लेकिन एक जरूरी बात है: सिर्फ PDF upload करके “summarize this” लिखना हमेशा best result नहीं देता। अच्छे results के लिए आपको summary का format, depth और purpose भी बताना चाहिए। इस guide में वही practical तरीका है।
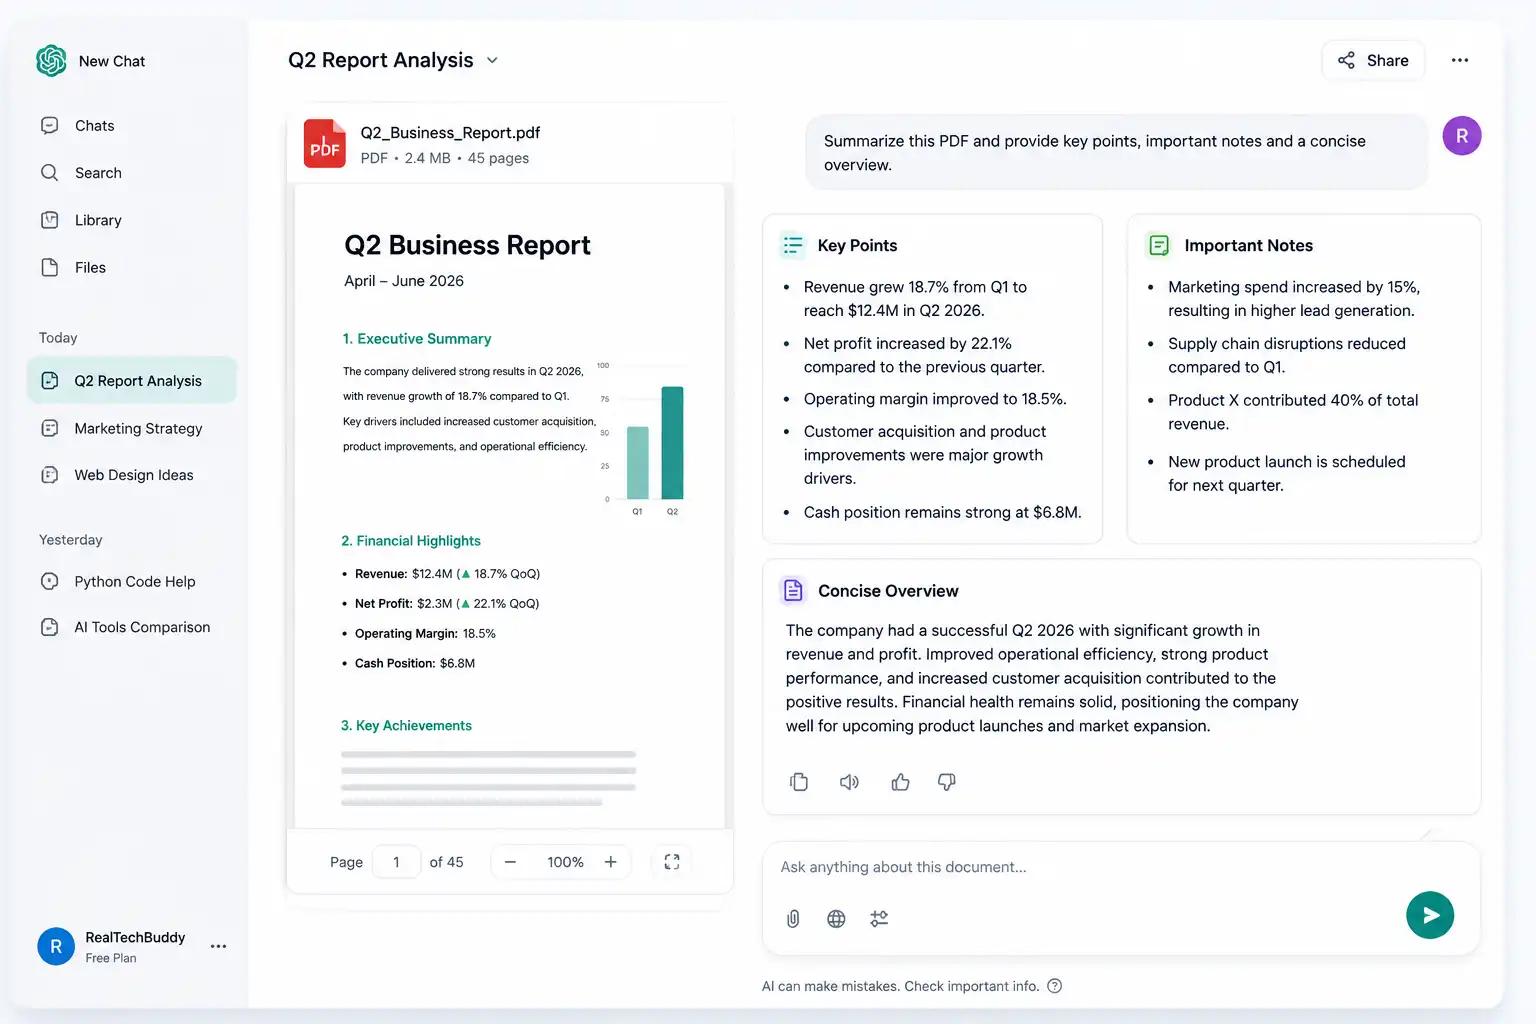
ChatGPT से PDF Summary बनाना क्यों useful है?
PDF summary का सबसे बड़ा फायदा सिर्फ time बचाना नहीं है। असली फायदा है कि आप एक ही document को अलग-अलग जरूरतों के हिसाब से समझ सकते हैं।
मान लीजिए आपके पास 80-page research paper है। आप ChatGPT से पूछ सकते हैं:
“इस PDF को 300 शब्दों में summarize करो।”
लेकिन वही document exam preparation के लिए चाहिए तो बेहतर prompt होगा:
“इस PDF से important definitions, concepts, examples और exam-worthy points निकालकर Hindi में notes बनाओ।”
OpenAI के अनुसार ChatGPT uploaded documents से summary के अलावा information extraction, comparison और document transformation जैसे काम भी कर सकता है।
यानी PDF को केवल छोटा नहीं करना है; उसे usable information में बदलना ज्यादा useful workflow है।
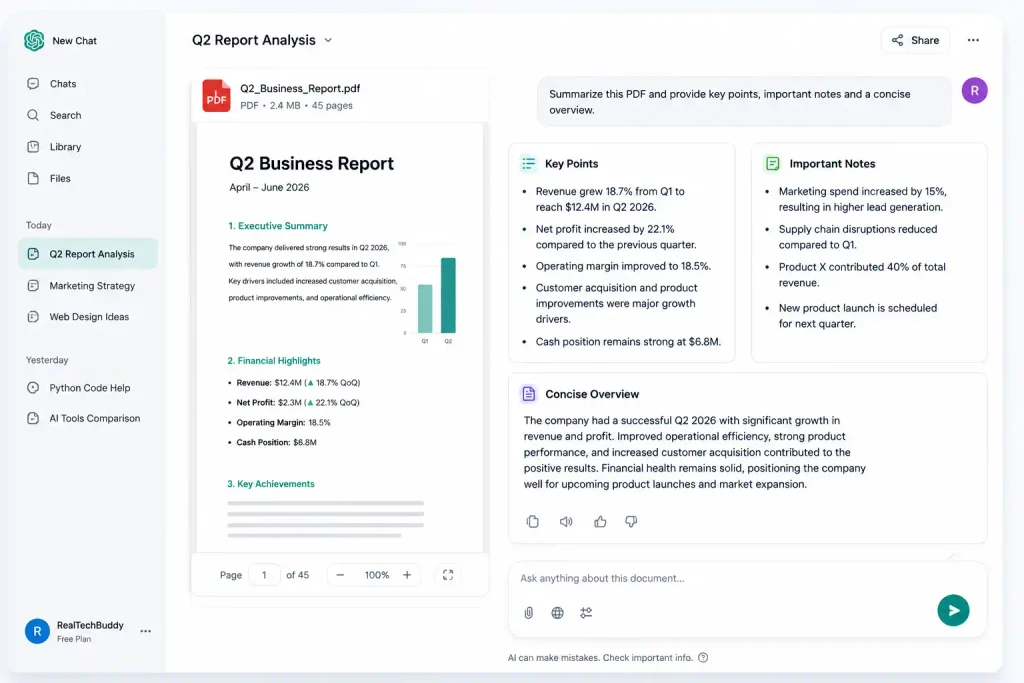
ChatGPT में PDF Upload करके Summary कैसे बनाएं?
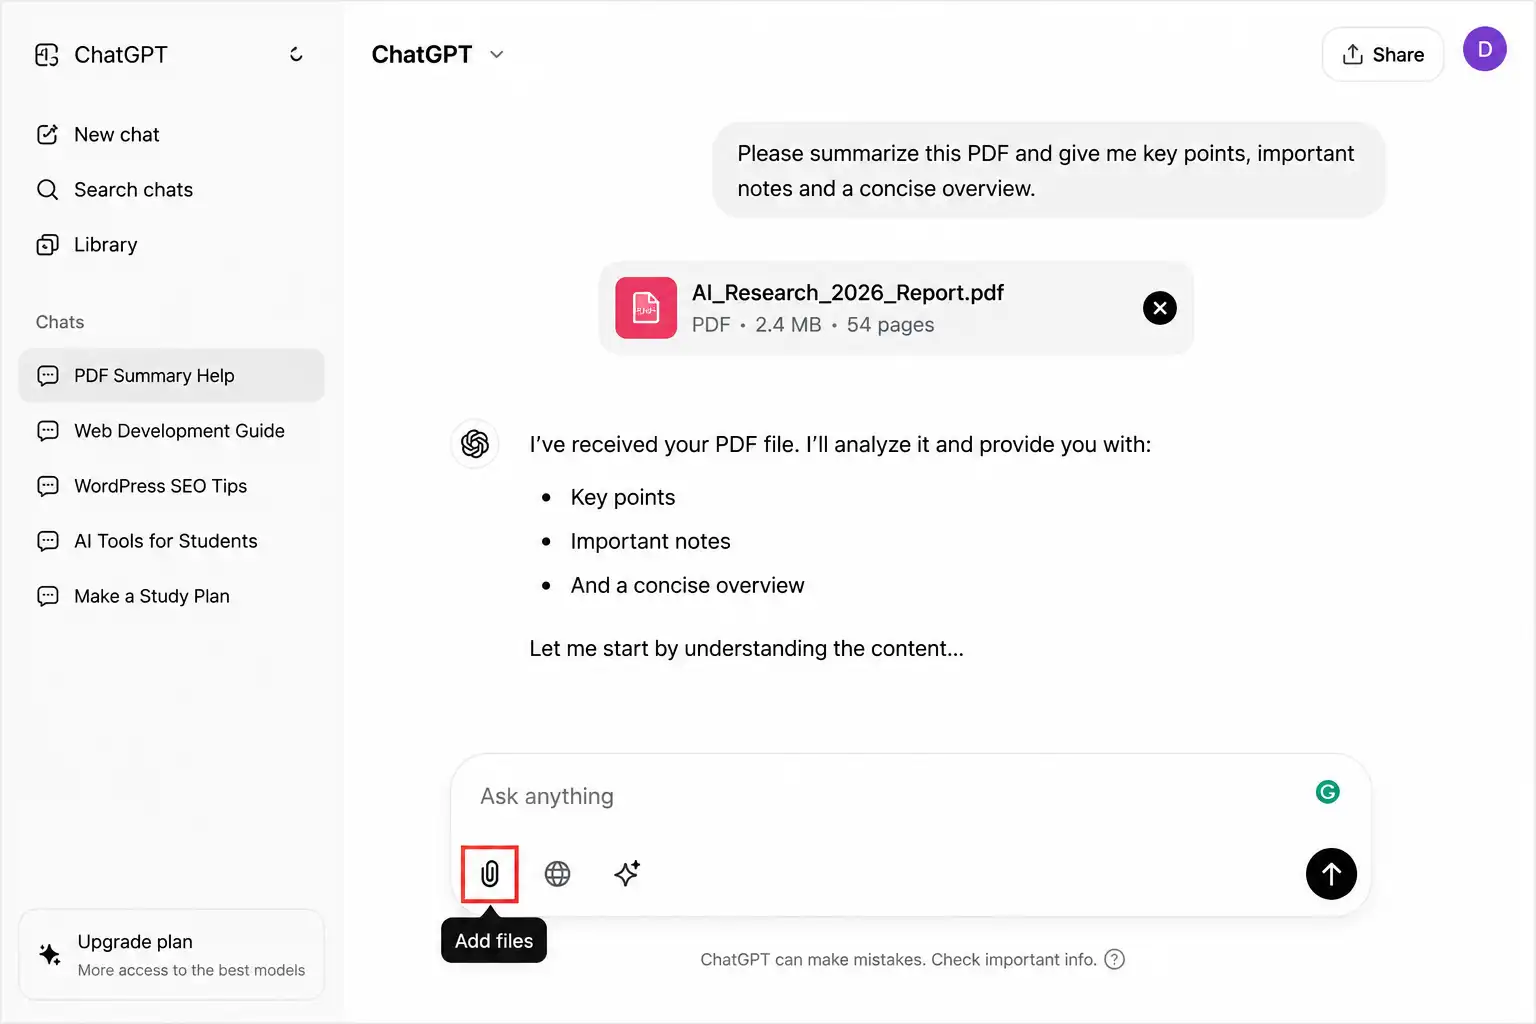
Step 1: ChatGPT खोलें
ChatGPT web या mobile app में नया chat खोलें और attachment/add-files option चुनें। PDF supported file types में शामिल है।
Step 2: PDF Upload करें
अपनी PDF select करके upload होने दें।
Current OpenAI documentation के अनुसार files की limits plan और usage के हिसाब से अलग हो सकती हैं। सामान्य file upload documentation 512 MB तक per file की hard limit और text/document files के लिए 2M-token limit बताती है। Free users के uploads limited हैं, जबकि ChatGPT Go जैसे paid plans में higher file-upload access मिलता है।
इसलिए केवल “मेरी PDF upload नहीं हो रही” देखकर यह assume न करें कि PDF supported नहीं है। पहले file size, account limit और current usage check करें।
Step 3: सिर्फ “Summary” नहीं, सही instruction दें
अब prompt लिखें।
Basic prompt:
“इस PDF का 500 शब्दों में आसान Hindi में summary बनाओ। केवल document की information use करो और important points को bullet points में बताओ।”
अगर आपको बेहतर result चाहिए तो prompt में ये चार चीजें बताएं:
क्या चाहिए + कितनी detail चाहिए + किस language में चाहिए + किस format में चाहिए
उदाहरण:
“इस PDF का chapter-wise summary बनाओ। हर chapter के 5–7 important points बताओ। कठिन concepts को simple Hindi में explain करो। अंत में पूरे document के 10 key takeaways दो।”
यही छोटा बदलाव output की usefulness काफी बढ़ा सकता है।
Short Summary, Detailed Summary और Notes में क्या फर्क है?
एक ही PDF से अलग outputs निकाले जा सकते हैं।
| तरीका | किसके लिए useful है | Output |
|---|---|---|
| Short Summary | जल्दी overview चाहिए | 5–10 key points |
| Detailed Summary | पूरा document समझना है | Section/chapter-wise explanation |
| Exam Notes | Students | Definitions, facts, important concepts |
| Executive Summary | Business users | Decisions, risks, findings |
| Q&A | Specific information चाहिए | Question-based answers |
मेरी Practical Insight
अगर PDF पहली बार पढ़ रहे हैं, तो सीधे detailed summary मांगना जरूरी नहीं है।
पहले:
Overview → Important Sections → Detailed Analysis
का workflow अपनाना ज्यादा practical है।
इससे आपको पहले document की structure समझ आती है और फिर सिर्फ relevant sections पर deep work कराया जा सकता है।
PDF Summary के लिए Best ChatGPT Prompts
1. Simple Hindi Summary
“इस PDF को आसान Hindi में summarize करो। Technical language को simple words में समझाओ और केवल important information रखो।”
2. Student Notes
“इस PDF को exam notes में बदलो। Important definitions, formulas, dates, concepts और examples अलग-अलग sections में दो।”
3. Research Paper
“इस research paper का summary बनाओ और अलग से बताओ: research objective, methodology, major findings, limitations और conclusion।”
4. Business Report
“इस report से key findings, important numbers, risks, opportunities और recommended actions निकालो।”
5. Long PDF
“पूरी PDF को एक साथ छोटा करने के बजाय पहले इसकी headings/sections identify करो। फिर प्रत्येक section का concise summary बनाओ और अंत में overall summary दो।”
यह last prompt खास तौर पर long documents में useful है, क्योंकि आप सिर्फ condensed text नहीं बल्कि document की structure भी समझना चाहते हैं।
क्या ChatGPT PDF के Charts और Images भी समझ सकता है?
यहां सबसे ज्यादा confusion होता है।
OpenAI की current documentation बताती है कि PDF के अंदर embedded visuals—जैसे graphs, diagrams और images—को समझने वाली Visual Retrieval capability अभी Enterprise तक सीमित है। इसे Free, Pro, Team या Edu users के लिए available नहीं बताया गया है।
इसका practical मतलब बहुत important है:
अगर आपकी PDF की main information text में है, तो normal summarization workflow काफी useful हो सकता है।
लेकिन अगर document का conclusion किसी chart, scanned page, diagram या image पर depend करता है, तो blindly summary पर भरोसा नहीं करना चाहिए।
बेहतर तरीका
ऐसे case में:
- PDF upload करें।
- Specific section के बारे में पूछें।
- जरूरी chart/page को अलग image के रूप में upload करके उसकी interpretation मांगें।
- Final answer को original PDF से verify करें।
AI ने document पढ़ा है, इसका मतलब यह नहीं कि हर visual detail equally understood हुई है।
Scanned PDF हो तो क्या करें?
हर PDF searchable नहीं होती। कुछ PDFs वास्तव में scanned pages होती हैं, जिनमें selectable text नहीं होता।
ऐसी PDF में result document structure और available processing पर depend कर सकता है। इसलिए अगर summary incomplete लगे, तो यह test करें:
“इस PDF के first 5 pages में actual text content क्या है? बताओ कौन-से sections successfully readable हैं।”
अगर content missing मिले तो relevant pages को image के रूप में upload करके analysis मांगना ज्यादा practical हो सकता है।
सिर्फ Summary नहीं, PDF से Specific Information निकालें
यह ChatGPT की सबसे useful capabilities में से एक है।
मान लीजिए 120-page PDF में आपको सिर्फ “refund policy” चाहिए।
पूरी PDF की summary मांगने के बजाय पूछें:
“इस PDF में refund, cancellation और eligibility से संबंधित सभी sections खोजो और उनके page numbers/section references के साथ concise explanation दो।”
OpenAI के official documentation के अनुसार uploaded documents से specific topics, references, quotes और sections extract किए जा सकते हैं।
इस approach से आपका workflow:
Read everything → Find one answer
से बदलकर:
Ask the document directly → Verify the relevant section
हो जाता है।
ChatGPT से PDF का Summary बनाते समय सबसे बड़ी गलती
सबसे common mistake है:
“Summarize this PDF.”
बस।
यह technically काम कर सकता है, लेकिन useful output की guarantee नहीं देता।
बेहतर prompt:
“इस PDF का summary 7 sections में बनाओ:
- Main purpose
- Important findings
- Key facts
- Important examples
- Risks/limitations
- What the reader should remember
- 5-line final summary.”
अब AI को सिर्फ document नहीं, output format भी दिया गया है।
यही difference generic AI answer और useful document workflow के बीच है।
क्या ChatGPT PDF Summary पर Blindly भरोसा करना चाहिए?
नहीं।
Summary पढ़ने के बाद तीन चीजें verify करनी चाहिए:
Numbers: percentages, dates, prices, statistics
Claims: “report says”, “study found”, “policy allows” जैसे statements
Context: कोई sentence document से बाहर का interpretation तो नहीं है?
खासकर research papers, legal documents, financial reports और government notifications में summary को original source का replacement नहीं मानना चाहिए।
एक useful follow-up prompt हो सकता है:
“मेरी summary में कौन-कौन से claims directly document में stated हैं और कौन-से inferred हैं? अलग-अलग बताओ।”
यह verification के लिए काफी practical है।
Privacy: Sensitive PDF Upload करने से पहले यह जरूर देखें
यह हिस्सा beginners अक्सर ignore कर देते हैं।
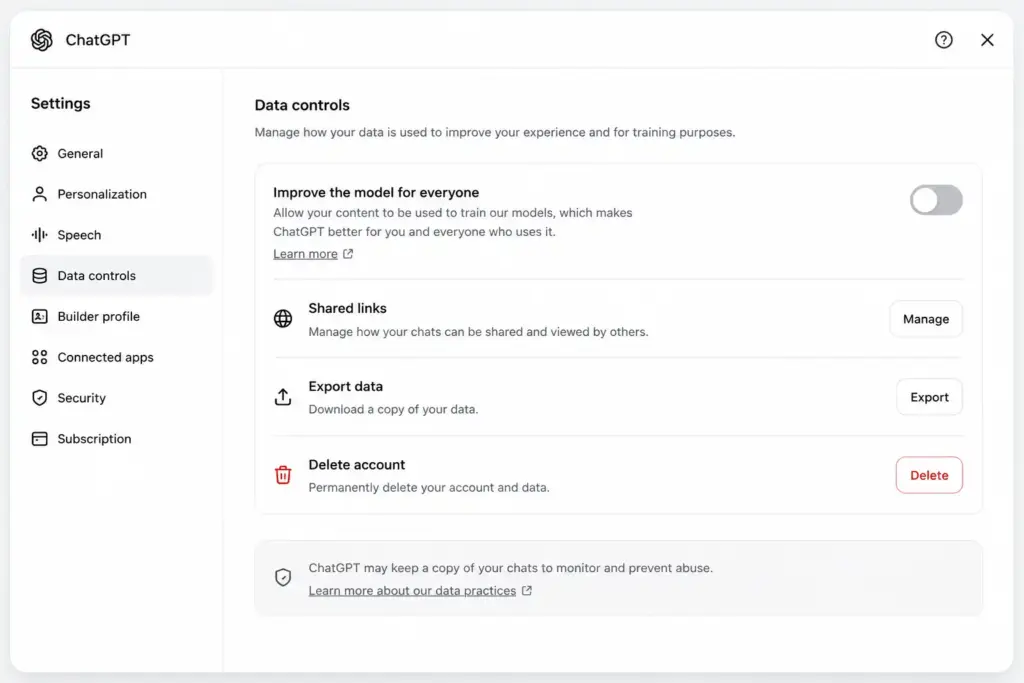
Personal ChatGPT accounts में data-use controls उपलब्ध हैं। OpenAI के अनुसार आप Settings → Data Controls → Improve the model for everyone को off कर सकते हैं। Temporary Chat conversations training के लिए use नहीं होतीं और 30 दिनों के भीतर systems से delete होने की बात OpenAI बताता है।
साथ ही, uploaded files Library में अलग से saved रह सकती हैं; सिर्फ chat delete करने से Library में saved file जरूरी नहीं कि delete हो जाए।
Practical advice
अगर PDF में Aadhaar details, bank statements, confidential contracts, private client information या अन्य sensitive data है, तो upload करने से पहले:
- जरूरत न हो तो sensitive information redact करें
- Data Controls check करें
- Temporary Chat जैसे available privacy option पर विचार करें
- काम खत्म होने के बाद saved file को Library से हटाएं
Privacy setting को समझना किसी भी AI document workflow का हिस्सा होना चाहिए।
3 Real-World Hypothetical Scenarios
Scenario 1: College Student
100-page study material मिला।
सिर्फ “summary” मांगने के बजाय:
“इस PDF को 10-mark exam preparation notes में बदलो। Important definitions और likely questions अलग बताओ।”
अब output पढ़ने और revision दोनों में useful होगा।
Scenario 2: Freelancer
Client ने 40-page project brief भेजा।
Prompt:
“इस document से project scope, deliverables, deadlines, exclusions और client requirements निकालो।”
यह पूरी PDF पढ़ने की जगह actionable checklist दे सकता है।
Scenario 3: Government/Policy PDF
नई policy document में 60 pages हैं और आपको eligibility समझनी है।
Prompt:
“इस PDF में eligibility से संबंधित सभी conditions निकालो। हर condition के साथ संबंधित section/page reference दो। कोई assumption मत जोड़ो।”
यह generic summary से ज्यादा valuable है।
ChatGPT PDF Summary vs Manual Reading
| Approach | Speed | Detail Control | Best Use |
| Manual Reading | Low | High | Critical documents |
| ChatGPT Summary | High | Medium–High | First-pass understanding |
| ChatGPT + Specific Prompts | Very High | High | Notes, research, reports |
| ChatGPT + Original Verification | High | Very High | Important decisions |
Practical Verdict
ChatGPT को “final authority” की जगह “first-pass document assistant” समझना ज्यादा sensible है।
यह distinction खासकर legal, financial, academic और policy documents में important है।
Common Mistakes
केवल one-line prompt देना
AI को expected output format बताएं।
पूरी PDF का blindly generated summary use करना
Critical facts को original document से verify करें।
Charts को automatically reliable मान लेना
Visual-heavy PDFs में capability plan/document type के हिसाब से अलग हो सकती है।
Sensitive documents बिना privacy check upload करना
Data Controls और Library retention पहले समझें।
Long PDF को एक ही giant summary में बदलना
Section-wise workflow अधिक useful हो सकता है।
The Practical Workflow I Would Prioritize First
मेरे हिसाब से सबसे effective workflow यह है:
1. PDF Upload → 2. Document Structure → 3. Short Summary → 4. Specific Questions → 5. Detailed Notes → 6. Original PDF Verification
यानी AI से पहले पूरी PDF “खत्म” कराने की कोशिश मत कीजिए।
पहले document का map बनाइए, फिर अपनी जरूरत के हिसाब से information निकालिए।
यही तरीका students, bloggers, researchers और professionals सभी के लिए ज्यादा practical है।
- AI से Logo कैसे बनाएं– CLICK HERE
- AI Se PPT Kaise Banaye– CLICK HERE
- 10 Viral Lofi Dusk Prompts CLICK HERE
- Instagram Features 2026: CLICK HERE